Groups have multiple purposes:
- They allow you to group devices together, for example based on department, and enable you to perform the following actions:
- Assign applications to be installed on all devices in that group.
- Assign a lifecycle tag (Test, Acceptance or Production) and create a schedule. When a schedule is defined for a group, all devices that are members of that group will update at the scheduled time (if updates or new applications are available).
- A group has a name and an ID in the form of an integer. The ID can be used during the installation of the NimDeploy MSI to automatically make a device a member of that group.
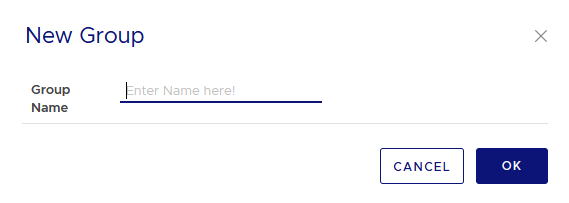
Creating a group #
Click on the green + button and give the group a name to create it.
The ID given to the newly created group is a number higher than the last group that has been made.
![]()
NOTE: The ID assignment does not take into consideration if previous groups are deleted. For example, if the last group has ID 40 and groups with ID 20 – 40 are deleted and a new group is made it will have ID 41.
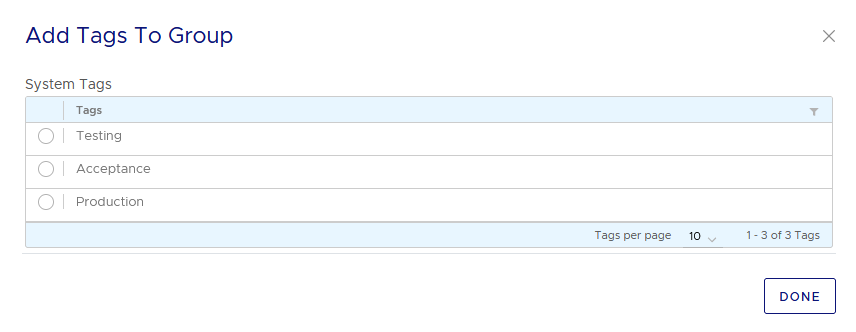
Changing lifecycle tag #
Updating the lifecycle tag of a group:
- Select the relevant group(s) and click the “Tag” button.
- Then choose the new lifecycle tag you want to assign.
Keep in mind that a device’s lifecycle tag will be determined by the lowest value assigned to it:
- Test = 1
- Acceptance = 2
- Production = 3
NOTE: If a device is a member of multiple groups, the lowest assigned value among those groups will be the actual lifecycle tag of that device.
Renaming a group #
Select a single group and click the rename group button. Give it a new name and save.
![]()
Deleting groups #
Select the group(s) you wish to delete and click the delete groups button.
![]()
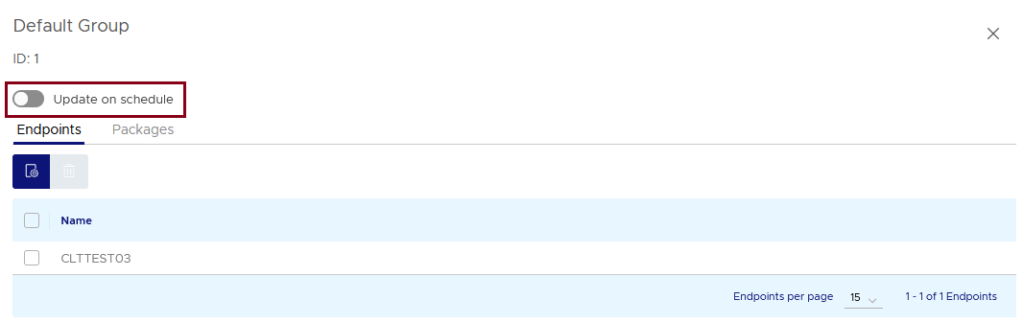
Adding endpoints #
Open the detailed view of group by clicking on the arrows in front of the group name click on the “Add Endpoints to Group” button. In the pop-up, select the endpoints you wish to add to the group.
![]()
Adding packages #
- Select the group you want to assign packages to
- Change to the Packages tab inside the detailed view
- click the “Edit Group Actions” button.
- Now you can drag and drop packages or use the green or red arrows.
- Using the “Immediate deployment” switch which will automatically start the deployment once an endpoint assigned to this group receives the list of packages needed to install or update.
- Press Save
Adding blueprints #
You also can add a blueprint which assigns all packages inside the blueprint to the group.
- Click on the + button in front of “Blueprints”.
- Choose a blueprint you wish to assign to this group and click on “done”.
- Using the “Immediate deployment” switch which will automatically start the deployment once an endpoint assigned to this group receives the list of packages needed to install or update.
- Press Save
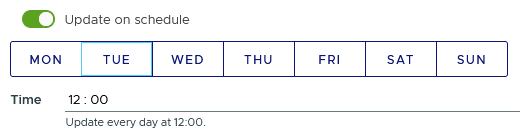
Setting an update schedule #
You may want NimDeploy to automatically check if there are new versions in the repository to be updated.
First go to the detailed view and activate the “Update on schedule” switch. This in turn will display additional options to configure.
The schedule is configured to trigger every day at 12pm by default. To change this, select on which days of the week you want the update to happen and by clicking on the time will allow you set at which time the update trigger happens.
You can specify days by clicking them.